Create and Log In a User
Guide details
This guide provides a step-by-step guide on creating and logging in a user using the CometChat platform with authentication using the Authentication Token. Additionally, you will need to make sure you have initialized CometChat in your app prior to logging in the user.Introduction
To log in a user, they must first be registered on the CometChat server. For first-time logins, the user needs to be created in CometChat. After this initial creation, we can generate an authentication token for the user. This authentication token, created via the CometChat API, will be used on the front-end to log the user into the CometChat UI Kit, SDK, or Widget. Once the user is successfully logged into CometChat, we can proceed to request or post any necessary data for the app.Prerequisites
- CometChat App (You can create one via the CometChat Dashboard).
- CometChat UI Kit or SDK (Custom Widget as well).
- Your application: Front-end and Back-end / Server Side.
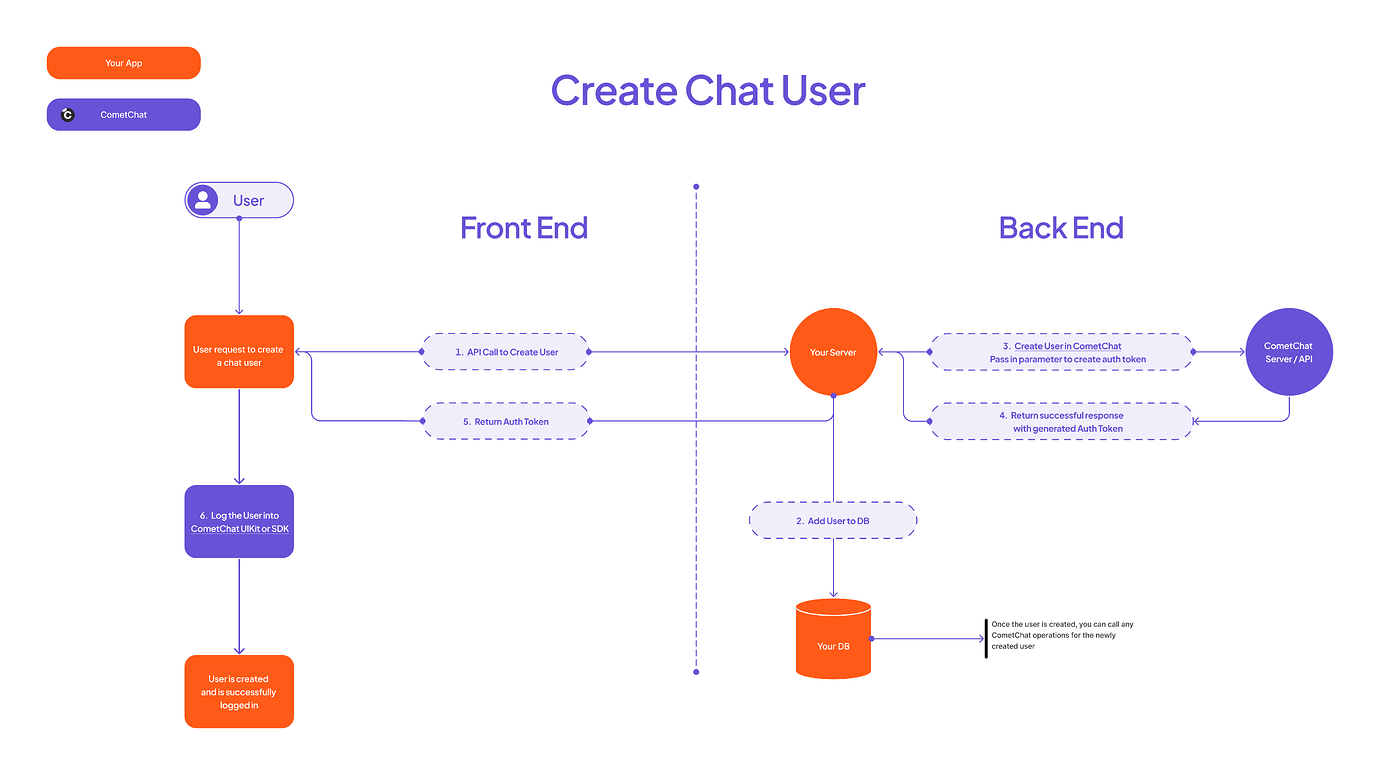
Create Chat User in CometChat
- Handle the user creation endpoint in your application.
- Add the user to your database.
-
Invoke the CometChat API endpoint to create a user.
- Optionally, pass a parameter to generate an authentication token for this user.
- CometChat will respond with the authentication token to your server.
- Your server will send the successful user creation response to your front-end application.
- Utilize the CometChat auth token to log the user into the CometChat SDK / UI Kit, or Widget.
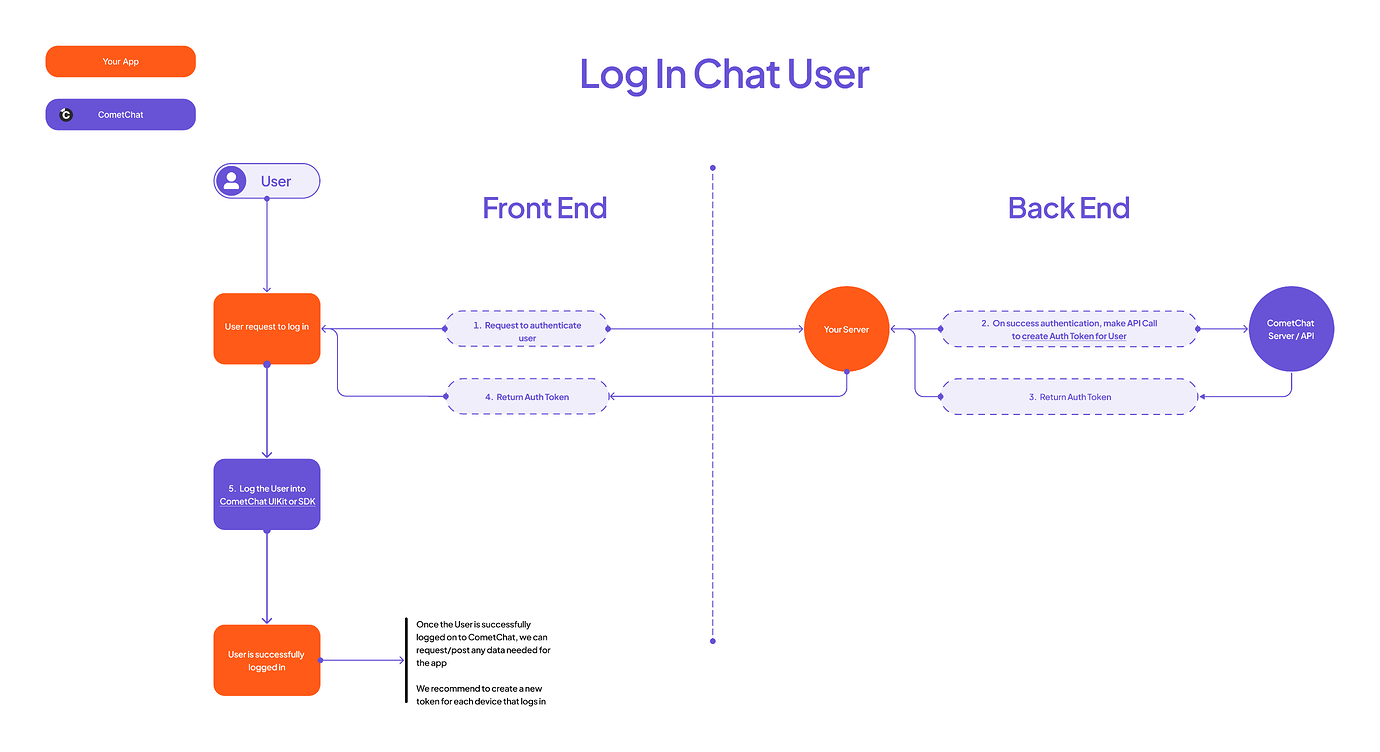
Log In an Existing User
- Authenticate the user within your application.
- Your API will then request a CometChat auth token for the user. You can call the create auth token API endpoint to create a new one.
- Your server responds with the successful retrieval of the CometChat auth token to your front-end application.
- Utilize the CometChat auth token to log the user into the CometChat SDK / UI Kit,
- If you’re using the Widget Builder, refer to the documentation on auth token–based user login.